Key Components
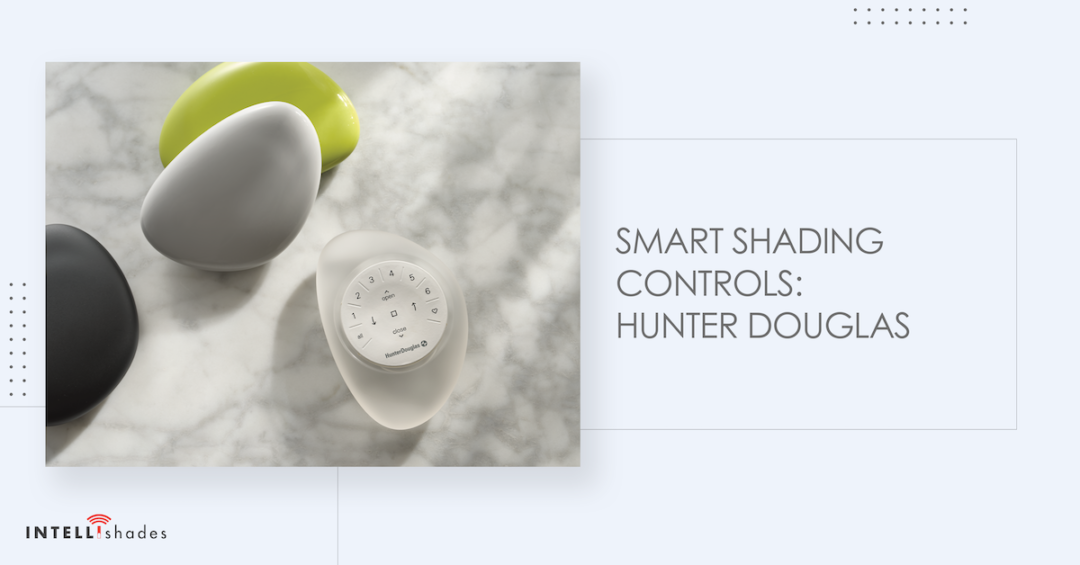
Hunter Douglas remote controls are available in two ways: the wall-mounted PowerView® Surface remote and the hand-held PowerView® Pebble® remote, available in various fashionable colors to compliment your decor. Both remotes use similar controls on the front of a sleek module.
The controls include:
- Six buttons to operate individual groups of shades
- An “All” button that controls all groups at once
- Open Button
- Close Button
- Stop Button
- Pressing & holding activates program mode
- Left Arrow
- Function varies with shade type
- Right Arrow
- Function varies with shade type
- Favorite Button
- Saves your favorite shade position
The back of the module includes two battery compartments and a button for reprogramming the device.

Inserting the Module
To insert the module into either wall-mounted or hand-held control options, simply align the ridges on the remote with the grooves on the PowerView® Pebble® or Surface mounting plate and gently push it into the slot.
Programming
A group can consist of a single window covering or multiple ones, with each remote offering six unique assignable groups, and a window covering has the flexibility to be assigned to more than one of these.
It’s advisable to only include window coverings with similar features and operation in a specific group, since there may be differences between shade styles. When a window covering is added to a group for the first time, it is automatically incorporated into the PowerView Shade Network, connecting window coverings and devices.
To add a window covering to a group, use the following instructions:
- Hold down the stop button on the remote until the lights blink. This shows that the remote is in programming mode.
- Select the desired group (1–6) on the remote, and the number should flash as confirmation.
- Press and hold the manual control button on the window covering itself.
- While still pressing the manual button, press open on the remote. The window covering will make a slight movement, showing that it has been added to the group. You can now release the manual control button.
- To exit program mode, press and hold the stop button again until the lights stop blinking.
To remove a specific covering, follow these instructions again, but on step 4 press the close button instead.
To set a favorite position:
- Adjust the window covering to the preferred position, either open or closed.
- Set the remote to programming mode, by holding down the stop button on the remote until the lights start blinking.
- Hold the manual control button on the window covering.
- While pressing the manual control button, press the ♥ favorite button on the remote. The window covering will make a slight movement, showing that it has been added to favorites. You can now release the manual control button.
- To exit program mode, press and hold the stop button again until the lights stop blinking.
Each window covering can accommodate one favorite position, and setting a new favorite will overwrite the previous one.

Basic Operation
Next, let’s outline some of the remote’s basic functions! Keep in mind that multiple motorized window treatments can be moved at the same time.
- To activate the remote, either pick it up or press stop.
- Utilize the all button or the individual group buttons (1-6) to choose which window coverings you would like to operate. The selected group button(s) will illuminate to indicate that they’ve been selected.
- To unselect, press the group button again, and the light will turn off, indicating the deselection.
- Press open to open the chosen shade(s).
- Press close to close the selected shade(s).
- Press stop to halt the movement of the window covering at any point along its movement.
- While a window covering is in motion, press the button for the opposite direction of its movement to reverse its direction.
- Press ♥ favorite to send the selected shade(s) to your predetermined favorite position.
Some window coverings will have vanes or a middle rail, which means they close differently than others. To operate these, press the right arrow to close the window covering and open the vanes, rotate the vanes to the right, or fully raise the middle rail. Keep in mind that single-function window coverings won’t respond to the arrow buttons.
For troubleshooting or additional assistance not covered in this blog, contact our team of Intellishades experts. We are eager to help you bring your home design vision to life, and make the most out of your new product. Contact us at (787) 705-5999 or visit https://intellishades.com/ for more information on our smart window shades and blinds, and additional services.